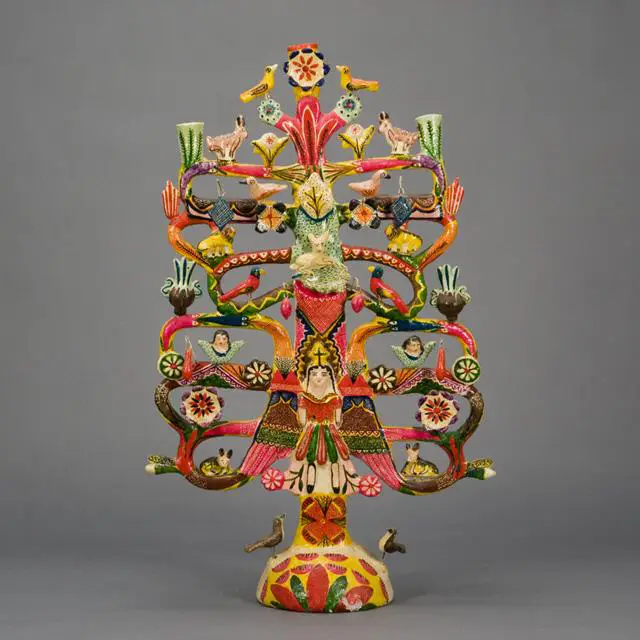
The Tree of Life appears in many forms of folk art across cultures. In Mexican Folk Art, ceramic Trees of Life often show birds, animals, angels and nativity scenes, while other traditions might include religious and fertility symbols.
Trees provide humans, animals, and birds with food, shade, homes, and materials for a wide variety of uses. Trees are anchor species in each ecosystem. The oldest tree in the world, Pando, is a colony of Quaking Aspen in Utah and is 80,000 years old. The oldest individual tree is a Great Basin Bristlecone Pine in California that is over 5,000 years old. Ancient, sacred and universal, the roots and branches symbolize a family ancestry tree and the interconnectedness of all humans and life. How will your tree of life tell the story visually of you and your family?
You'll need
- cardboard (cereal box)or railroad board (8.5” x 11”)
- construction or decorative papers
- scissors
- liquid glue or stick
- pencil
- markers or colored pencils
- sequins and/or gems
- air dry clay
- optional: paint
Procedures
- Walk outside and look at the trees around you for inspiration. Stretch your arms out and up to the sky like branches reaching for the sunlight.
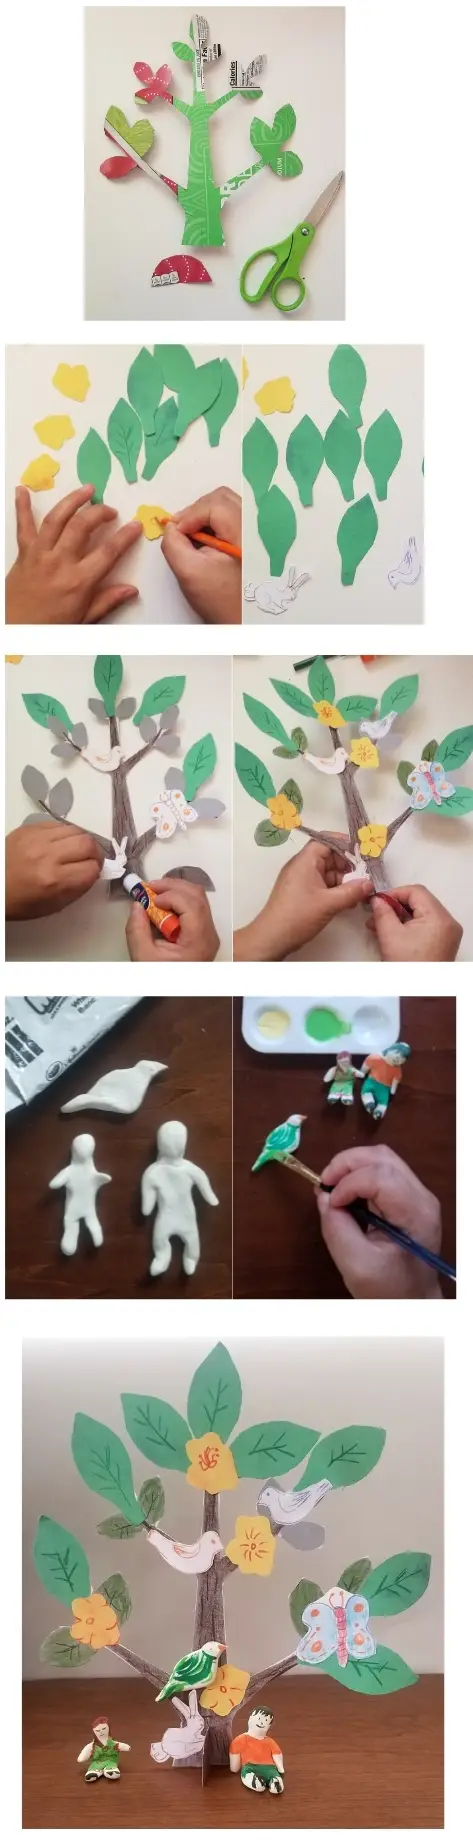
- Select cardboard or railroad board, sketch a tree outline on the board or use the template on the following page (glue the template to the board). Cut out your tree outline.
- Use decorative or construction paper, sketch and cut out tree elements, such as leaves, berries, flowers, birds. A Tree of Life is often used to tell a story or something important to the maker.
- Use markers or colored pencils to add details to your leaves, berries, flowers, birds, angels and other figures. Add and glue sequins and/or gems.
- Layout all the tree elements and glue them to your tree outline. Set your tree aside to dry.
- Create small figures with the air dry clay that represent each member of your family, important people in your life, or birds/animals that you want to include at the base of your tree of life. Use markers or paint to bring them to life.
- Make the base for your tree by cutting a half circle. Diameter should be slightly bigger than the size of the tree trunk. Starting at the rounded top of the half circle, cut a slit half way through the form. Cut a slit at the center of the tree trunk same length as the half circle slit. Then join the base and tree together by interlocking the slits.
- Camina afuera y mira los árboles a tu alrededor en busca de inspiración. Estira los brazos hacia fuera y hasta el cielo como las ramas que alcanzan la luz del sol.
- Elige entre un pedazo de cartón o cartulina, dibuja la forma de un árbol en el pedazo o usa la forma de árbol disponible en la siguiente página (pega la forma al cartón o cartulina). Corta la forma del árbol.
- Usa papel decorativo o construcción, dibuja y corta los elementos del árbol, como hojas, bayas, flores, aves. A menudo un árbol de la vida se utiliza para contar una historia o algo importante para el fabricante. Otras figuras que puedes incluir, miembros de tu familia o personas importantes en tu vida.
- Usa marcadores o lápices de colores para agregar detalles a las hojas, bayas, flores, aves, ángeles y otras figuras. Agrega y pega lentejuelas y/o gemas.
- Posiciona todos los elementos del árbol y pegalos a la forma de tu árbol. Pon el árbol a un lado para que seque.
- Con arcilla que seca al aire libre, crea figuras pequeñas que representen a cada miembro de tu familia, personas importantes en tu vida, o aves/animales que desees incluir en la base de tu árbol de la vida. Usa marcadores o pintura para darle vida a tus figuras.
- Haz la base de tu árbol cortando un medio círculo. El diámetro debe ser un poco más grande que el tamaño del tronco del árbol. Comenzando en la parte redondeada del medio círculo, haz un pequeño corte en el medio y hasta la mitad de la forma. Haz un corte en el centro del tronco del árbol de la misma longitud que el corte del medio círculo. Después, une la base y el árbol juntos entrelazando los cortes.